How to fix a broken Micro USB port on CHUCK
The Micro USB ports on CHUCK can chip off due to the impact of a crash or even due to many plug/unplug operations.
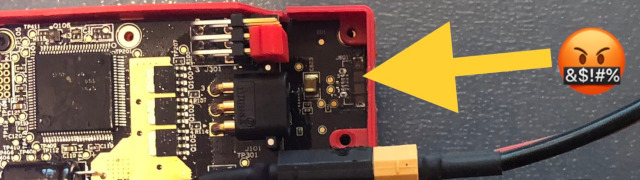
The good news: there are two solutions/fixes to it.
This option requires micro soldering and a very still hand! Please note, we do not recommended to solder the original port back onto the PCB, the soldering points are simply too tiny.
If the cable is taken out on top of CHUCK, as per the photo below, the soldering points are well protected from the impact of a crash. This requires to drill a small hole through the plastic cover.
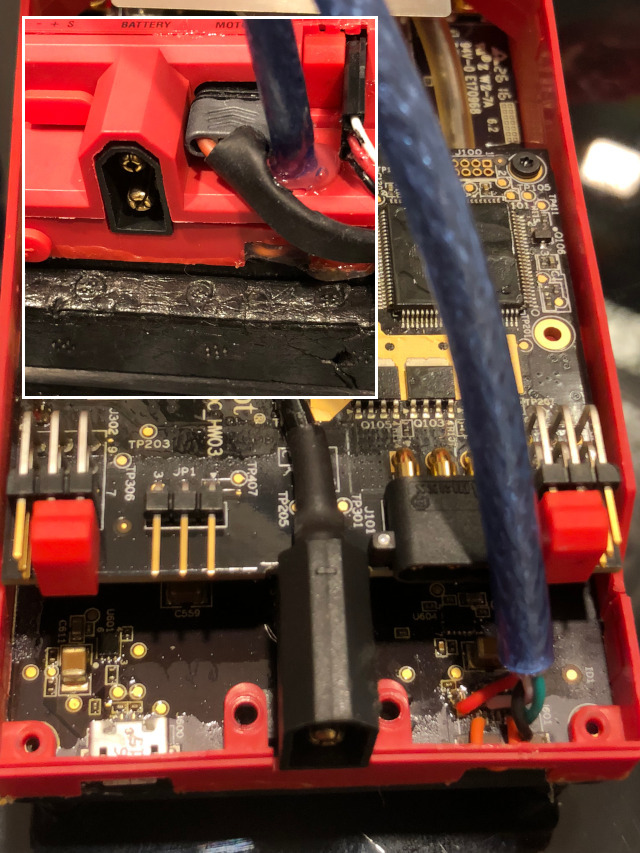
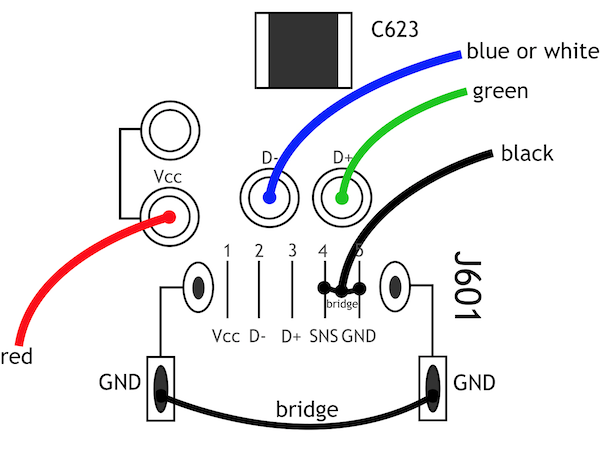
First, you need to open CHUCK (remove the sticker on top to reach the screws). There are bigger soldering points behind, onto which you can solder the cable directly. Follow the schematics below. Don't forget to bridge pin 4 and 5 where the Micro USB port chipped off.
| Photo | Schematic |
|---|---|
 |
 |
This option makes use of the left Micro USB port and can be done without opening CHUCK and without any soldering. However, it cannot prevent the other USB port to chip off as well.
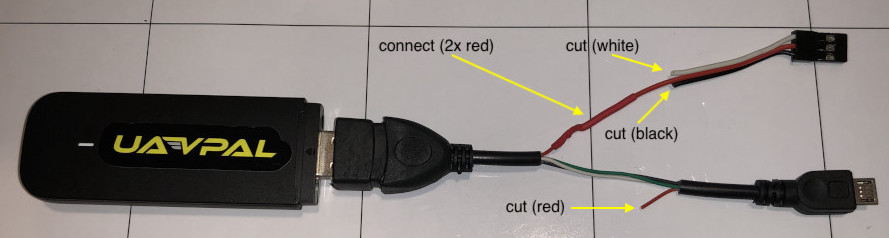
You need a servo cable with a 3 pin female connector (JR or Futaba connector with 0.1" pin spacing) to get the 5V VCC power from CHUCK's SBUS connector. Only the middle pin/wire (red) is required.
Strip the USB OTG cable in the middle and cut the existing power supply (VCC, red). Now connect the servo cable's red wire to the USB's VCC power (red wire) - the one connecting towards the female USB plug and not towards the Micro USB connector!
Connect the cable as shown below - Good to go!
